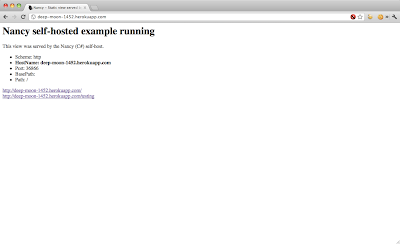
Last week I mentioned how I had successfully deployed Nancy / Mono (C# frameworks) onto Heroku. This post covers how you can deploy your own Mono projects onto Heroku.
As before, this approach is completely unsupported by Heroku and I’m not 100% sure if it’s production ready. I would love to hear your experiences.
0) Prerequisites
There are a few requirements before deploying a project.
– The solution can compile using Mono on Linux (Ubuntu 10.04 – Lucid Lynx).
– The launch application must be a self-hosted executable.
– The self-hosted executable must stay alive and not exit. Example: https://github.com/BenHall/nancy-demo-hosting-self/blob/master/src/Program.cs#L20-23
1) Update heroku gem
Before you continue, make sure your running the latest heroku gem as you need the buildpack option which is only supported in later versions. Thanks Andy Pike for pointing this out.
$ gem update heroku
2) Listening to Heroku requests
This is the only part which I’m not too happy with. In order for Mono to accept Heroku requests, you need to bind the listener to the full hostname provided by Heroku – for example http://deep-moon-1452.herokuapp.com.
The application also needs to listen on a particular port randomly defined by Heroku. This is provided via an environment variable.
Example:
https://github.com/BenHall/nancy-demo-hosting-self/blob/master/src/Program.cs#L12
Ironically this is the part which blocked me and after multiple combinations I was left with hard-coding the name as my last resort – see the commit https://github.com/BenHall/nancy-demo-hosting-self/commit/4d9e07bed92559a53b1463c37e837045d59c3a9a
3) How projects are built during deployment
Projects are built on Heroku during the git push process. To find a solution to build, the command “ls $BUILD_DIR/*.sln | head -1” is used. This will return the name of the first solution file found.
Once the name has been determined, xbuild is called with the output streamed back. If the build fails, the deployment is stopped.
4) How the application is launched – Procfile
Once the project has been built, the self-hosted executable needs to be executed via a Procfile.
An example can be found here:
https://github.com/BenHall/nancy-demo-hosting-self/blob/master/Procfile
The web property specifies the command used by Heroku. The first part is the path to mono which is defined in the buildpack and shouldn’t be change. The second part is the relative path to your compiled executable.
In the example I also defined a local environment command allowing me to replicate the hosted environment locally via “foreman start local”.
5) Creating the Heroku environment – Cedar and buildpacks
When creating your Heroku application to host your project, it’s important to specify the stack as cedar along with the buildpack for Mono. The buildpack defines the steps required to download Mono from my S3 account, configure the environment and build your solution.
$ heroku create --stack cedar --buildpack http://github.com/BenHall/heroku-buildpack-mono
Remember to change the hostname your exe listens on otherwise you’ll received a Bad Request (Invalid Host) response.
If you receive the error “!Name must start with a letter and can only contain lowercase letters, numbers, and dashes” then make sure your using the latest Heroku gem (currently 2.18.1).
6) Push
A simple push should now be all you need.
$ git push heroku master
Done! Technical details about how the buildpack works in a future post.
Important links:
Buildpack: https://github.com/BenHall/heroku-buildpack-mono
Example: https://github.com/BenHall/nancy-demo-hosting-self
tl;dr: The main steps are
0) $ gem update heroku
1) $ git clone https://github.com/BenHall/nancy-demo-hosting-self
2) $ cd nancy-demo-hosting-self
3) $ heroku create --stack cedar --buildpack http://github.com/BenHall/heroku-buildpack-mono
4) Replace deep-moon-1452 in src/Program.cs to the application name created above
5) $ git commit -am "Changed application name"
6) $ git push heroku master
7) Tweet to say how amazing it is.
